By now, you’ve probably read somewhere online that starting an e-commerce business on Shopify is a good way to bring in extra income. But what you might now know is that you can create a Shopify store in about two hours or less.
Shopify is an e-commerce platform used by over one million merchants worldwide, from brick-and-mortar stores, massive online retailers, and small online business owners.
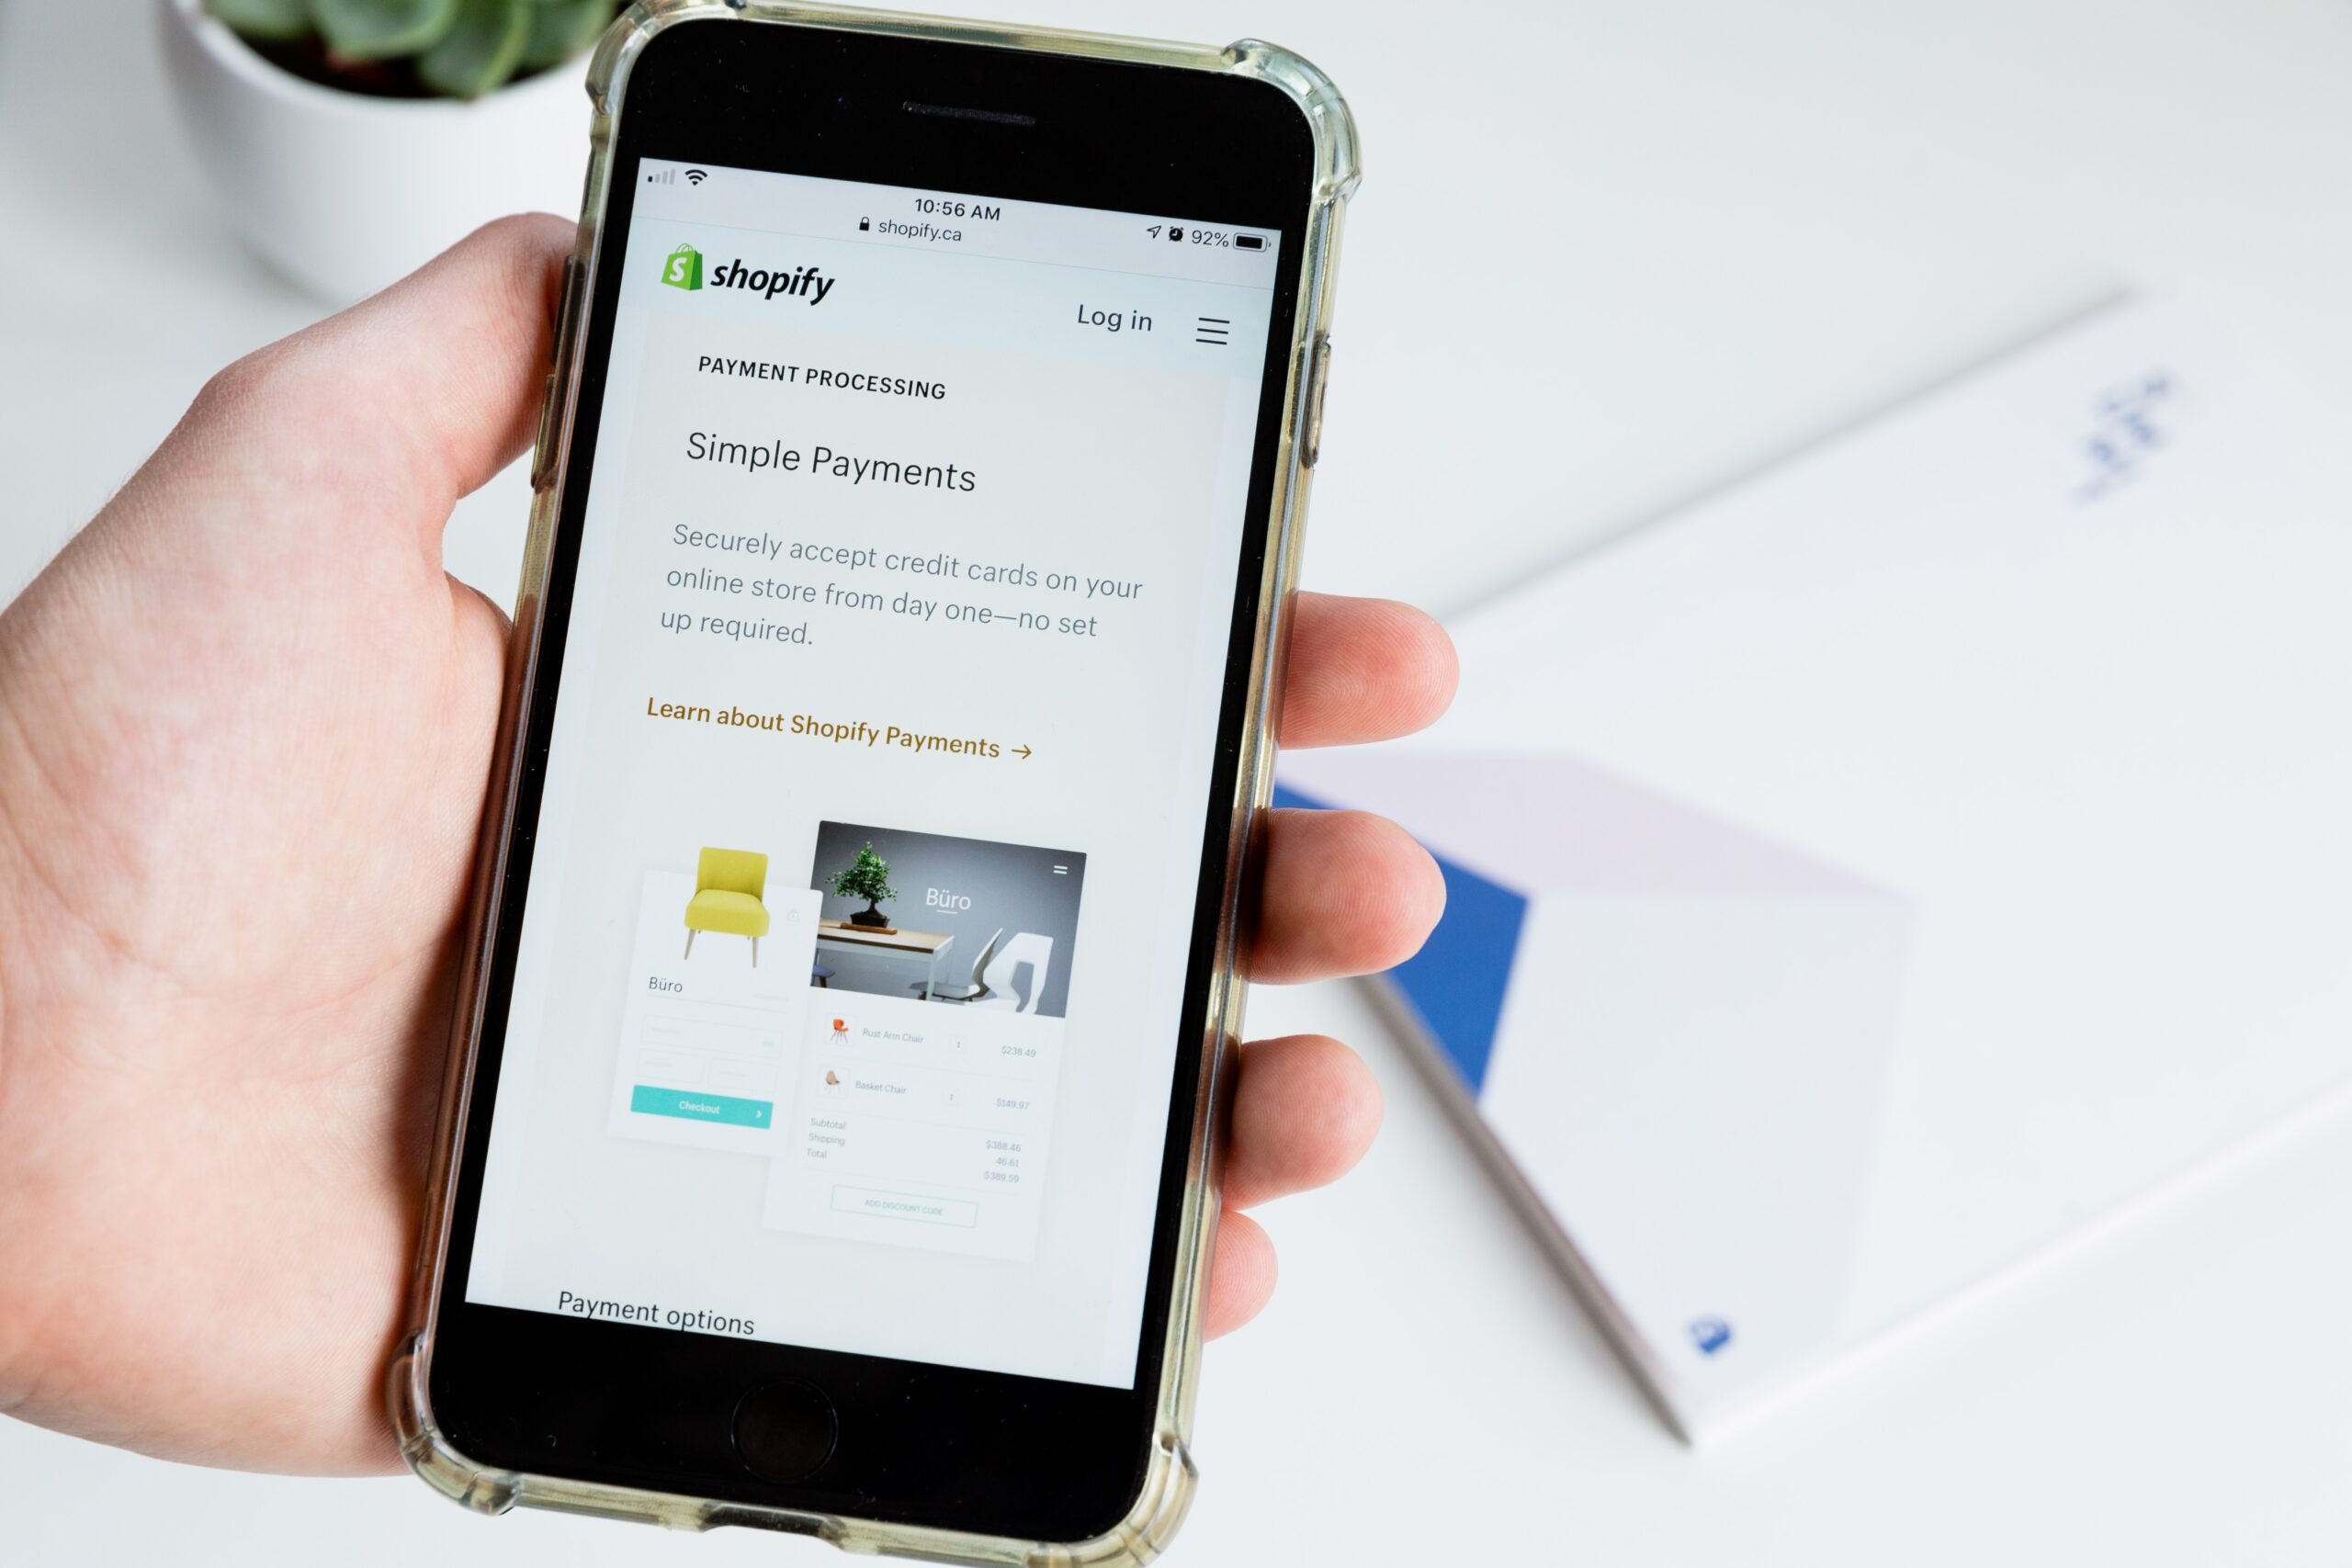
It’s popular because it offers robust tools, an easy-to-navigate interface, and customizable options for nearly every kind of business owner. And what’s really cool about Shopify for beginners is that you can access the majority of that for free or super cheap.
Table of Contents
- What is Shopify?
- What Can You Sell on Shopify?
- How Much Does It Cost To Create a Shopify Store?
- Your 10-Step Complete Shopify Tutorial
- 1. Determine your niche and start planning your shop
- 2. Sign up with Shopify
- 3. Start setting up your online shop
- 4. Pick a theme for your Shopify store
- 5. Add your products
- 6. Set up your payment system
- 7. Shipping and taxes
- 8. Add applications to make your Shopify store more owner-friendly
- 9. Go live with your Shopify shop
- 10. Start driving traffic to your Shopify store
- The Final Word on Shopify for Beginners
Shopify for Beginners: How to Launch Your Shopify Store in 2025
What is Shopify?
Shopify is an e-commerce platform you can use to set up a store and sell products online. Shopify’s platform is a complete system, meaning you can use it for marketing, payments, and shipping. That’s one of the reasons it’s become so popular – you can manage all of your online shop needs in one place.
Shopify offers customizable themes and advanced selling features so you can set your shop up exactly the way you like it. There are also tons of Shopify tutorials on the platform if you get hung up on any aspect of the set-up process.
Something I didn’t realize until recently is that brick-and-mortar businesses are using Shopify to sell their products and services online. My local yarn store, for example, uses Shopify for class registrations.
Read more at Best Side Hustle Ideas (Make $1,000+ Per Month)
What Can You Sell on Shopify?
In addition to how easy it is to create a Shopify store, one of the other reasons it’s become so popular is because you can sell almost anything on Shopify.
You can sell clothes, workout equipment, pet supplies, shoes, home goods, electronics, beauty products, baby gear, jewelry, accessories, kitchenware, and pretty much anything else. This list of trending products gives you an idea of what’s selling well right now.
What most people do is create a Shopify store with a specific theme, and then find products that fit that vibe. For example, you can start a store for:
- Cat lovers – think cat beds, cat-themed clothes, cat collars, cat toys, cat costumes, etc.
- Natural or minimalist baby gear – Baby toys, clothes, blankets, beds, books, and more.
- At-home workout enthusiasts – Yoga mats, workout clothes, suspension trainers, pull-up bars, resistance bands, etc.
Realistically, you could use Shopify to sell flea market flips, things you’ve made, collectible items you have hanging around your house, and even services.
The things you can’t sell are pretty much anything that sounds like it might be illegal to sell online – weapons, illegal drugs, pharmaceuticals, supplements, alcohol, anything gambling-related, or adult content. Check out Shopify’s Acceptable Use Policy for more information.
How Much Does It Cost To Create a Shopify Store?
Shopify is free for the first 14 days, and this gives you a chance to get your online store set up and running before you actually start investing in the product. After your 14-day trial, there are three plans to choose from, starting at $29/month – this is the best option for beginners.
Your 10-Step Complete Shopify Tutorial
1. Determine your niche and start planning your shop
I touched on this a little bit when I talked about what you can sell on Shopify – picking a theme and then building out your shop based on products related to that theme. You can start brainstorming by thinking about:
- What are you interested in?
- Is there a market you know a lot about?
- What does well on Shopify? Remember that trending products link I shared earlier.
After you have a few ideas, start planning the kinds of things you would sell. Let’s pretend that you just love houseplants, and want to create a Shopify store for other plant enthusiasts.
Shipping actual plants might get expensive, but what about selling things like:
- Stationary with pictures of plants
- How-to books explaining how to care for your plants
- Macrame plant hangers
- Artwork with pictures of house plants
- Plant lover t-shirts
- Tools an indoor gardener would use to care for their plants
I did a quick Google search for “gifts for plant lovers” for a lot of those ideas, and you can search like that to find products that fit your niche.
At this point, you want to start thinking of names for your Shopify store. Come up with several iterations in case your shop’s name is already taken.
2. Sign up with Shopify
The sign-up process is incredibly easy and sets up Shopify for beginners specifically. You can sign up through our exclusive Shopify link, and enter your email address, a name for your Shopify store, and a secure password.
After that, Shopify will ask you a series of questions to get to know you and the kind of items you’ll be selling.
Next, enter your address and phone number so you can get paid.
3. Start setting up your online shop
For the sake of teaching you how to build a Shopify store, I’ve started a free trial for my brand new “I <3 Plants” Shopify store. Unfortunately “I Heart Plants” was already taken and I had to think quickly.
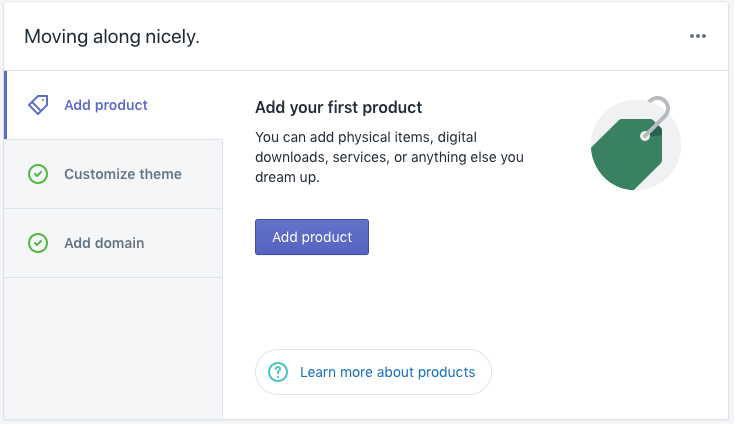
After you sign up, here’s your dashboard where you’ll start setting up your shop:
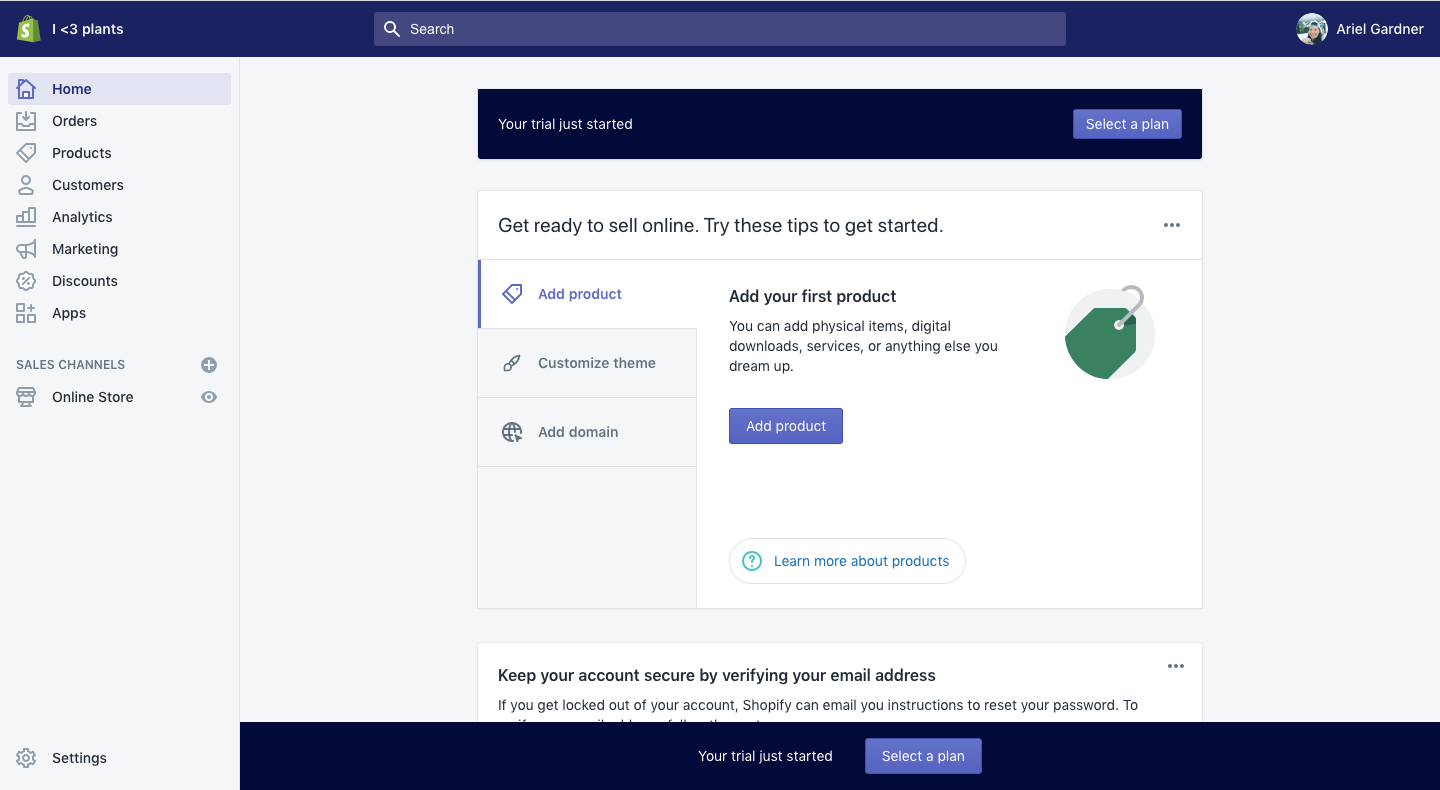
There are three main things you need to do get your shop up and running:
- Add products
- Customize your theme
- Add a domain
I like starting with the theme first, but you can go in any order you’d like. It’s highly recommended that you buy a domain name for your Shopify shop. If you don’t buy your domain name, your shop’s URL will end with .myshopify.com.
Buying your domain name looks much more professional. You can connect an existing domain or transfer one to Shopify. Or, you can buy your domain name through Shopify directly.
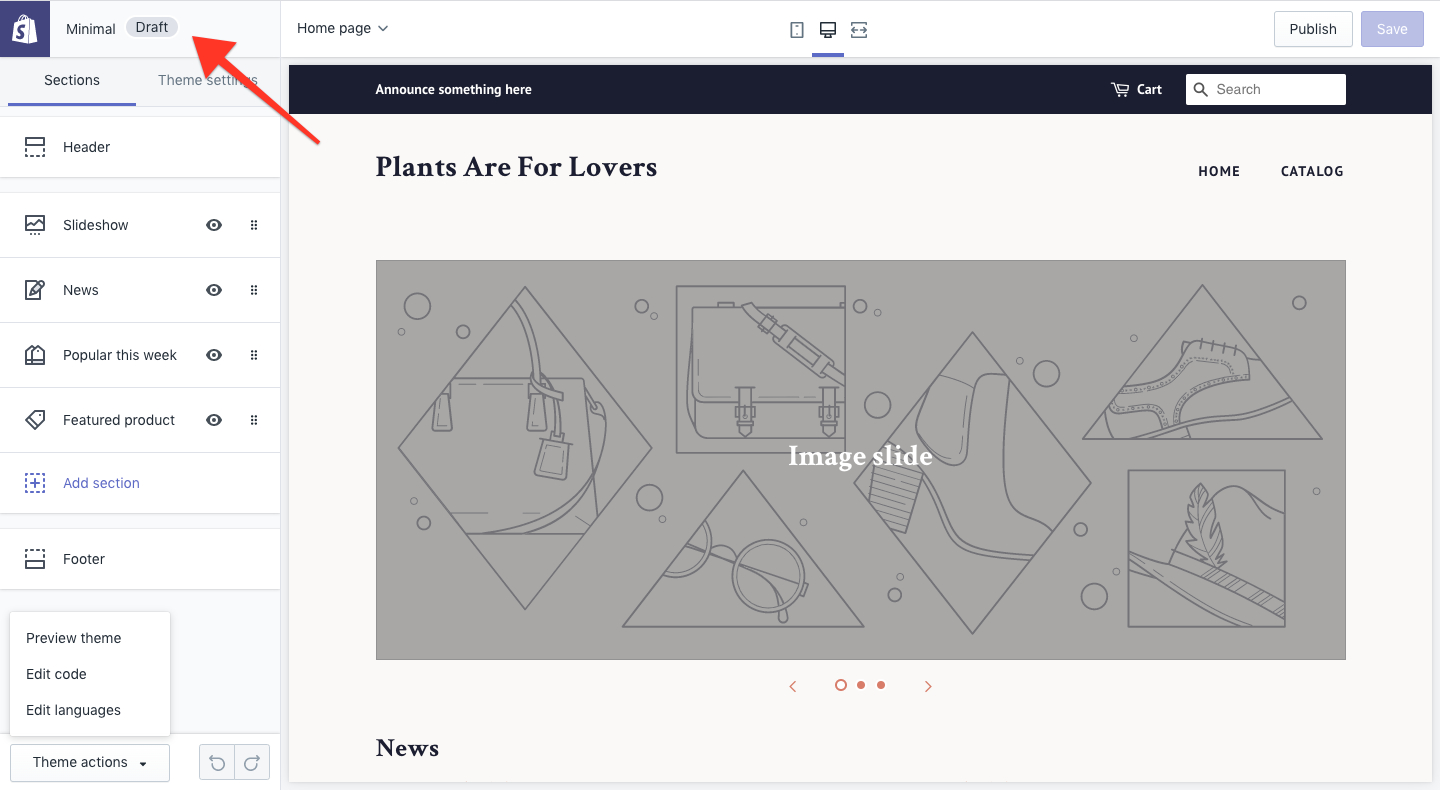
Here’s where I changed my shop name from “I <3 Plants” to “Plants Are For Lovers.” The domain name didn’t exist for the first option, and there weren’t any iterations that I liked. Turns out the latter was available, so I changed the name of my Shopify store.
Here’s how to change the name of your Shopify store:
- Go to Settings
- Click on General
- Update your shop’s name
- Click Save
If you want to buy your domain name through Shopify, you enter the URL you want and Shopify will tell you if it’s available. Once you decide on something, click “Buy” and then enter your credit card information.
Buying your domain name through Shopify gives you email hosting services, too. You’ll have to go to the primary email address you entered when you set up your Shopify store to finish verifying your domain name.
4. Pick a theme for your Shopify store
One of the reasons Shopify for beginners is so easy is because there are several free themes that you can customize to your heart’s content. Or you can start with a blank template and completely customize it on your own.
You can also pay for themes, which cost around $150-$180/each. You can browse paid themes based on industry, so for Plants Are For Lovers, I can find paid themes specific to home and garden. But I’m going to stick with a free theme in the beginning.
Before you select a theme, you can check to see what kind of shops and products it works best for.

Going with a free theme in the beginning and not spending too much time on customization can save you a ton of time and it’s the best way for beginners to get started. You’ll obviously need to go in and add some photos and copy, but don’t overthink the design of your site. It’s like starting a blog – you can easily get overwhelmed and never launch your site.
Here’s my shop after the theme was installed. Notice it says “Draft” in the upper left corner, which means it’s not fully live yet.
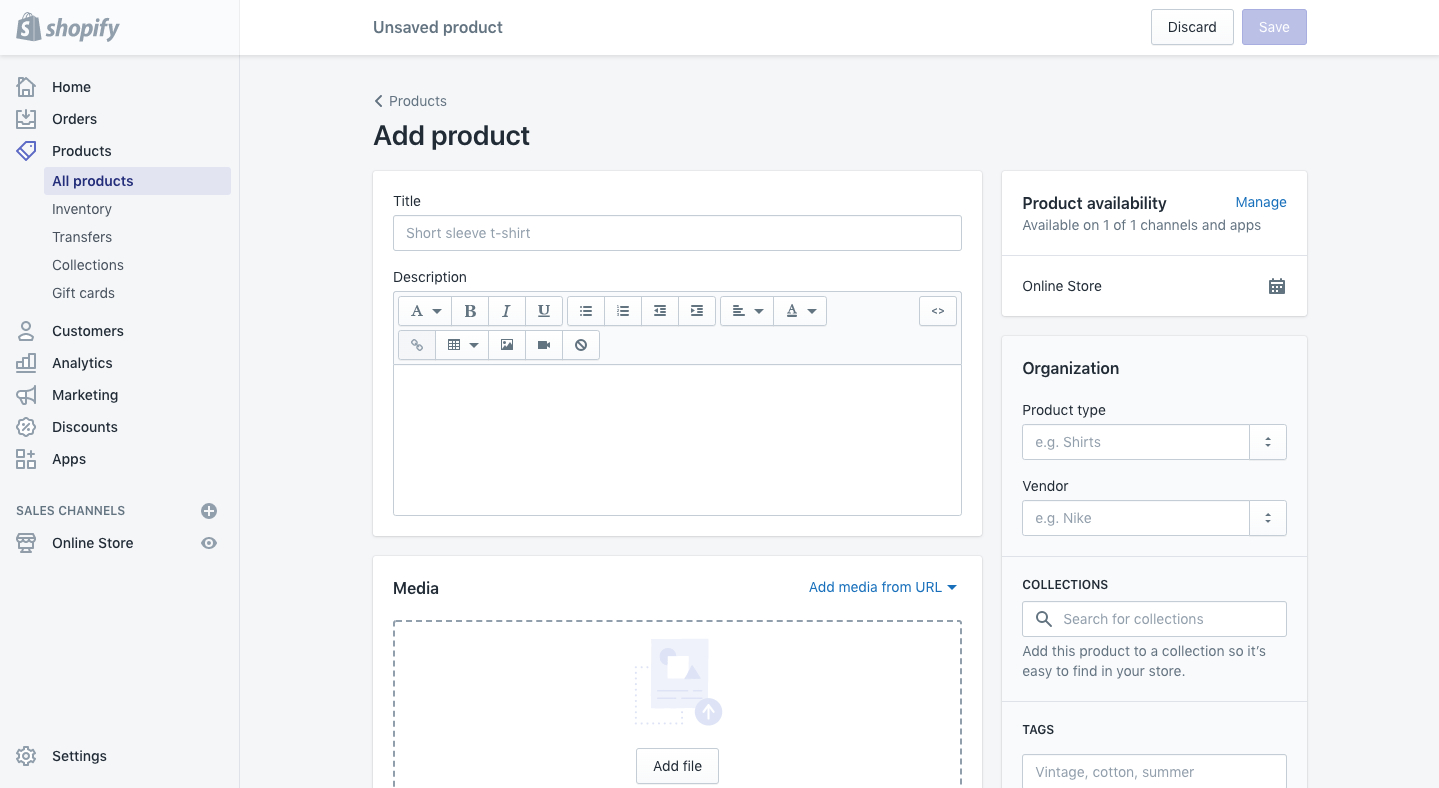
5. Add your products
Back in Step #1, you brainstormed the kinds of products you might sell in your Shopify shop, and now that planning is going to pay off. You’re going to start adding products to your shop.
You’ll need a photo, price, and a detailed description of each product. Think about how people might search for products like this because it will help your SEO (search engine optimization).
Only use high-quality images and be consistent with your shop’s theme when you style and select your images. Simple images that highlight the product almost always do better, and you’ll want a few photos for each item.
Here’s where you enter your items:
Shopify for beginners tip: Dropshipping is one of the most inexpensive ways to find products and sell them on Shopify. After you list products in your store from a dropshipping supply (AliExpress is one of the largest), here’s what the online shopping process looks like:
- Customer places an order from your Shopify store
- The order is automatically sent to the dropshipping supplier
- The supplier puts the order together
- The order is sent by the dropshipping supplier to the customer
Shopify handles the majority of the work, from payment to getting your order shipped out from the supplier. It can become a source of fairly passive income because you aren’t involved in stocking or shipping. Here’s one of the best Shopify tutorials for dropshipping.
6. Set up your payment system
Setting up your payments allows your customers to make purchases on your Shopify site. You start by going to the Settings button in the bottom left corner of your dashboard and then clicking on Payments.
Here’s the screen that pops up:
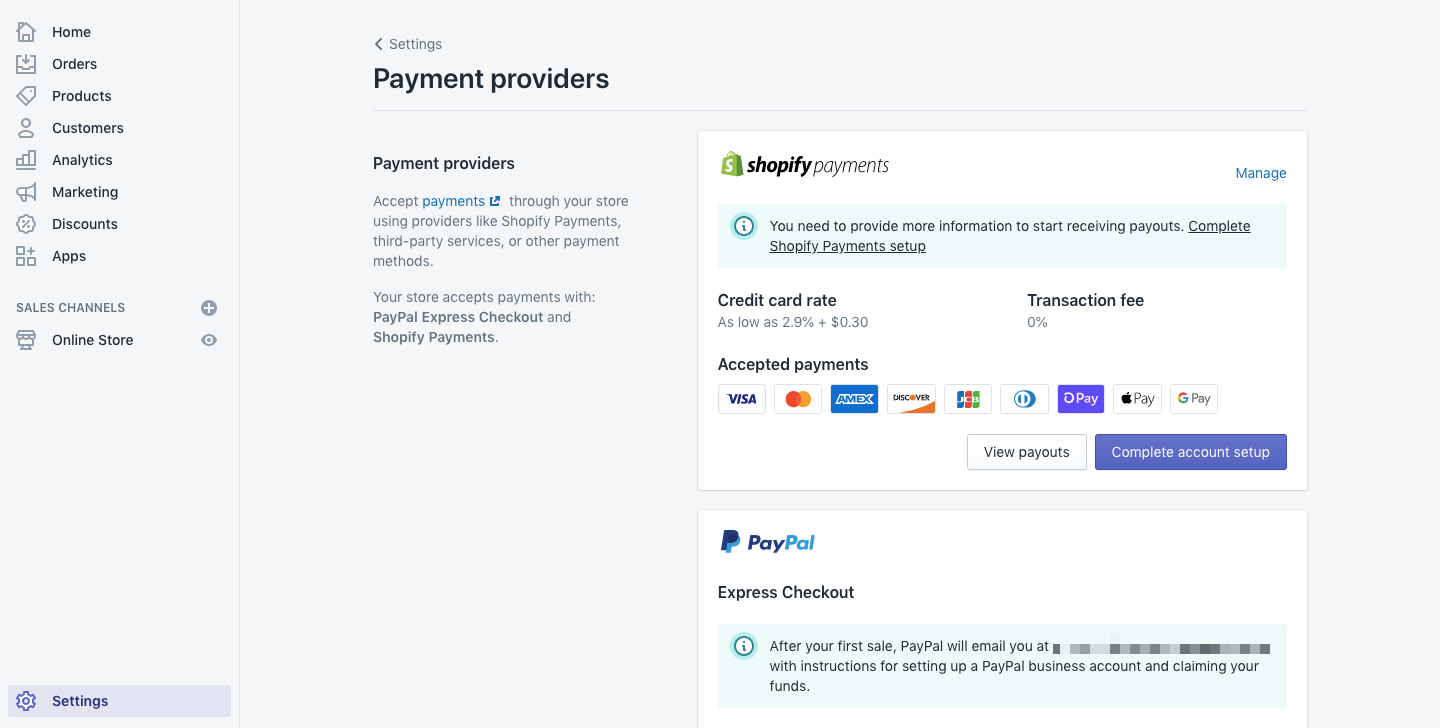
They are also options for PayPal Express Checkout, Amazon Pay, other third-party providers, and even manual payment methods. You can customize the forms of payments you accept under Shopify Payments.
Here’s what to consider about selecting additional payment methods:
- There are no additional transaction fees when you go with Shopify Payments, although you will pay credit card rates (this is typical of any store, and the rates are as low as 2.9% or $0.30)
- Choosing third-party payment methods, like PayPal or Amazon Pay, will charge additional fees
- Manual payment methods aren’t recommend – these are things like personal check or bank transfer
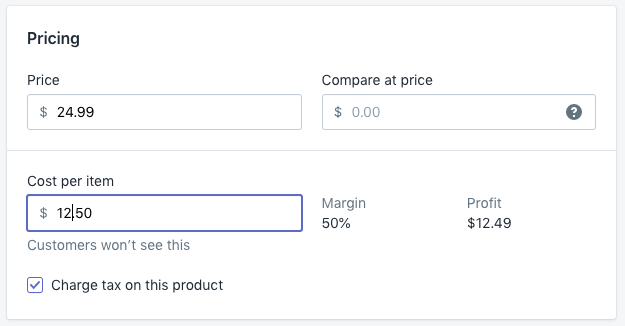
7. Shipping and taxes
This is just some basic housekeeping before you go live with your site. Shipping and tax information might be filled out correctly already, but you should make sure all of the correct boxes are checked.
Check on shipping and taxes by:
- Go to the Product page on your admin page
- Click on a product
- Scroll down to Inventory & Variants, and click on the edit link next to Product Variant
- Make sure the boxes Charge Taxes and Requires Shipping are checked – shipped items should have these checked unless there is some very unusual circumstance
- Check to see that the product’s weight is entered in the appropriate field so Shopify can correctly calculate shipping
- Repeat for each product in your Shopify store
Here’s what it looks like when you’re checking on the taxes for each item:
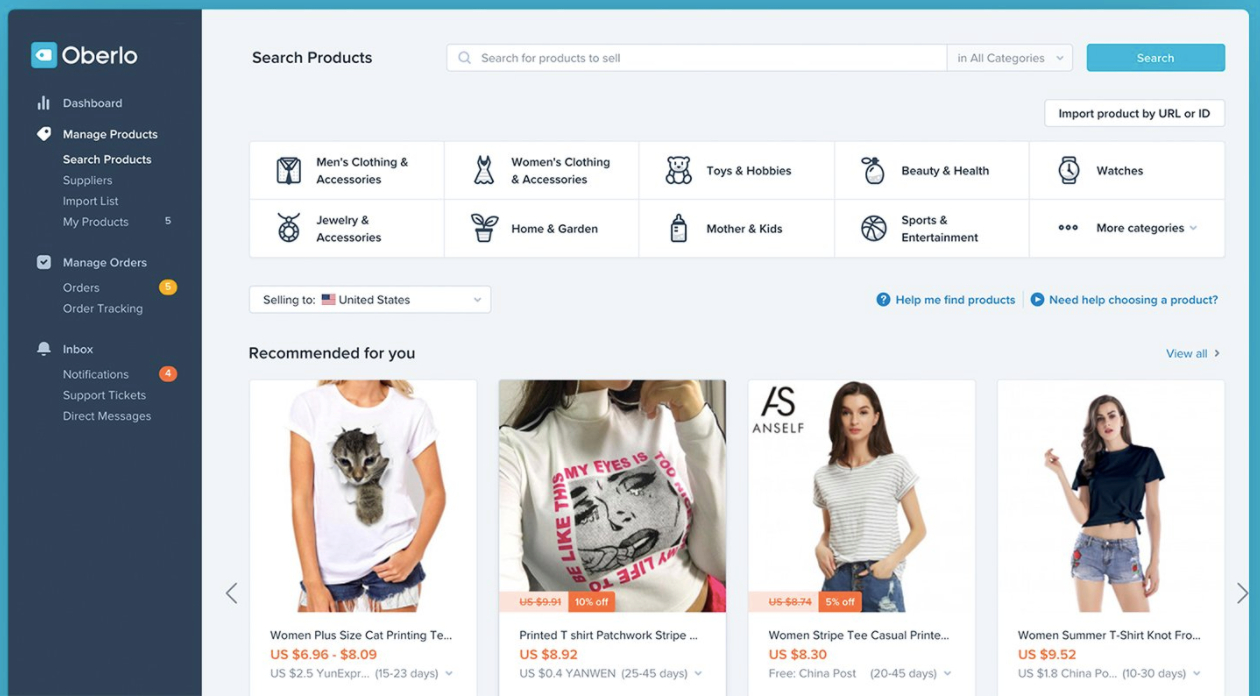
8. Add applications to make your Shopify store more owner-friendly
Shopify offers dozens of applications that make it easy for you to run your online storefront and others that make it more user-friendly for customers. You do not need to go through all of these applications when you’re first starting, but keep them in mind for the future.
You can search the Shopify App Store by trending apps, ones that help you set up your store, apps for selling more, communication tools, email marketing solutions, and more.
If you want to do dropshipping, the app store is also where you’ll find the tools to help – Oberlo is a top-rated app for dropshipping. It’s free for beginners, and you can use it to source products and add them to your shop’s products page.
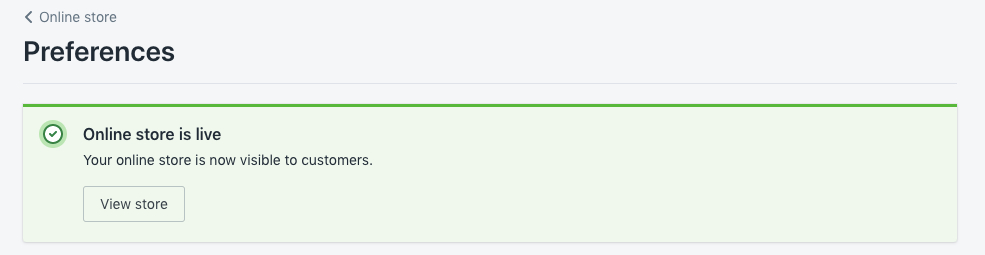
9. Go live with your Shopify shop
Your Shopify store is almost ready to go, but right now it’s password protected. Having it password protected allows you to test your site out before it goes live to the world.
To take your Shopify site live:
- Go to the sidebar on your admin page
- Under “Online Store,” click “Preferences”
- Scroll down to “Password Protection” and unclick “Enable Password”
- Click “Save” in the top right corner
You’ll see this message pop up at the top of the screen:
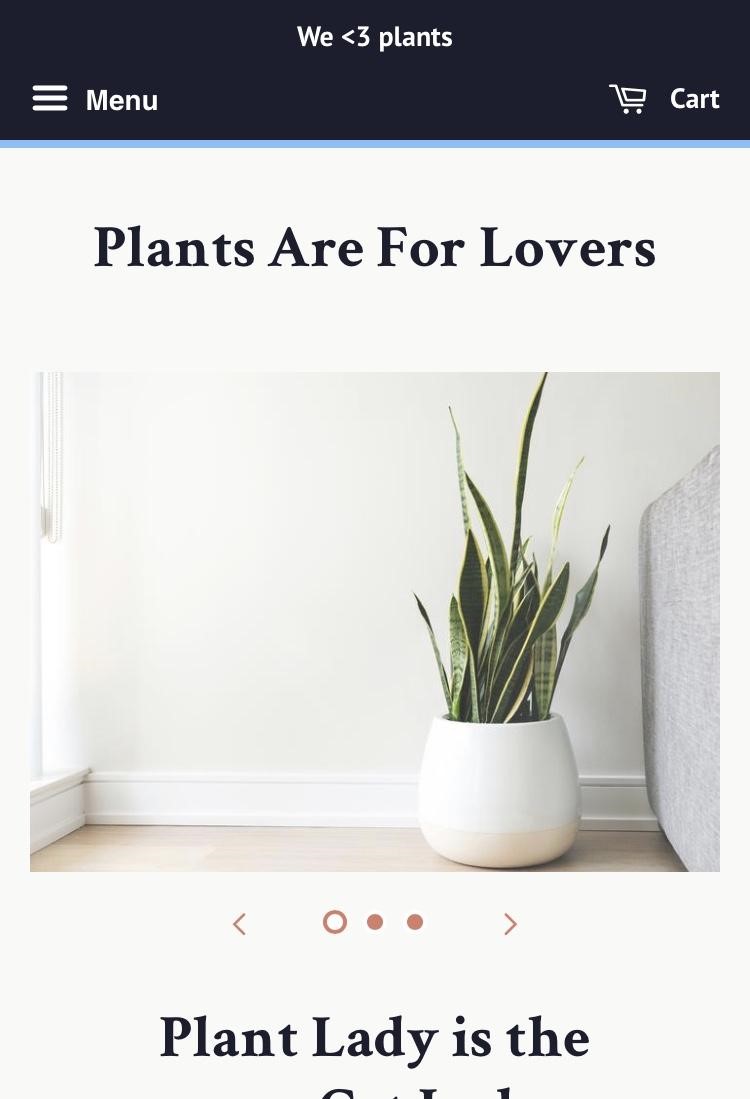
After going live with my site, I immediately grabbed my phone to see what it looked like. It still needs some finessing, but it’s a solid start.
10. Start driving traffic to your Shopify store
I have read through a lot of Shopify tutorials, and the one thing many of them leave out is how to get customers to your brand new Shopify store. It’s like, “Here’s a Shopify for Beginner’s Guide, but we left out the part about finding customers.”
That’s unfortunate because the truth is that your brand new baby site is now competing with all of the big sites that have been growing their brands and site visibility for years.
As it stands, my shop, for example, isn’t going to be found when someone searches “gifts for plant lovers.” But I can start driving traffic to my Shopify site in a few different ways.
Optimizing for SEO
It takes time to grow your organic search results, but doing some basic SEO work is how you plant the seeds… plant puns (ha!) – my shop is really rubbing off on me already. You can build out your SEO over time, but do not think you can neglect this.
Follow this SEO checklist for your Shopify site:
- Find keywords relevant to your brand – what search terms can customers use to find your store?
- Make sure to add those keywords (without stuffing them in there) to the content on your site, including page titles, product descriptions, image alt text.
- Check to make sure that all of the URLs and filenames on your site match the content.
- Write a couple of short blog posts related to the products on your site (Shopify sites are enabled for blogs), and make sure the keywords are in those posts. Helpful content like how to use the products on your site or maybe a listicle is an easy way to think about content.
- Make sure your site can be crawled and indexed by Google by adding your sitemap.xml to the Google Search Console.
- Add and edit title tags, meta descriptions, and URL for all of your product pages, collections, blog posts, and web pages.
Run Facebook ads to your site
Facebook ads are an investment, but it’s a very inexpensive (as little as $1/day) and effective way to advertise your site. Your ads can target users by demographics and interests, which means you get to put ads up on the world’s largest social media platform, but direct them to the kind of users who will be interested in the products you’re selling.
Build your social media presence
Facebook, Instagram, and Pinterest are all social media platforms that you should consider for your Shopify shop. Start with one platform, master it, and then move on to the next. You do not need to work on all of them at the same time – you run the risk of burning out before you get a good feel for what you’re doing.
Shopify has applications that make it easy to grow your social media presence, so be sure to check out which options are available for each platform.
The Final Word on Shopify for Beginners
Shopify has become such a popular e-commerce platform because it’s so easy for beginners to get started, and it allows you to build your site for super cheap and invest in it as you see fit.
You can start an online shop for practically anything, and people do. Here are a few examples of what you can do with Shopify:
- Brilliant sells bikes and bike accessories
- Studio Neat sells a small collection of minimalist tools
- Artist Nick Mayer users Shopify to sell prints, posters, stationery, and more
- Allbirds even uses Shopify to sell their popular, sustainable line of shoes
That’s just a small selection of the things you can do with a Shopify store. When you’re ready, use our exclusive M$M link for your 14-day free trial of Shopify.